

Well, as promised, I've tried a new method of dump and fill on my auto transmission fluid. Nothing special about a dump and fill where the fluid is changed in stages, mainly because you cannot get all the fluid out in one go. Some people just do one dump at each service but I thought I’d have a go at getting the majority of it out in one go. Draining is straightforward and so should the filling be - there’s a T55 filler plug on the top of the gearbox. That’s fine on a vehicle with a gear shift lever such as the Freelander 2 but the Evoque has a electronic gearchange unit mounted on a bracket and it’s this that must be removed to get at the filler plug. It’s connected to the box by a splined shaft and my fear was that it would go back wrong and give me grief. I did 6 dumps so the gearchange unit would have needed removing 6 times. That’s 6 chances of putting it back wrong!
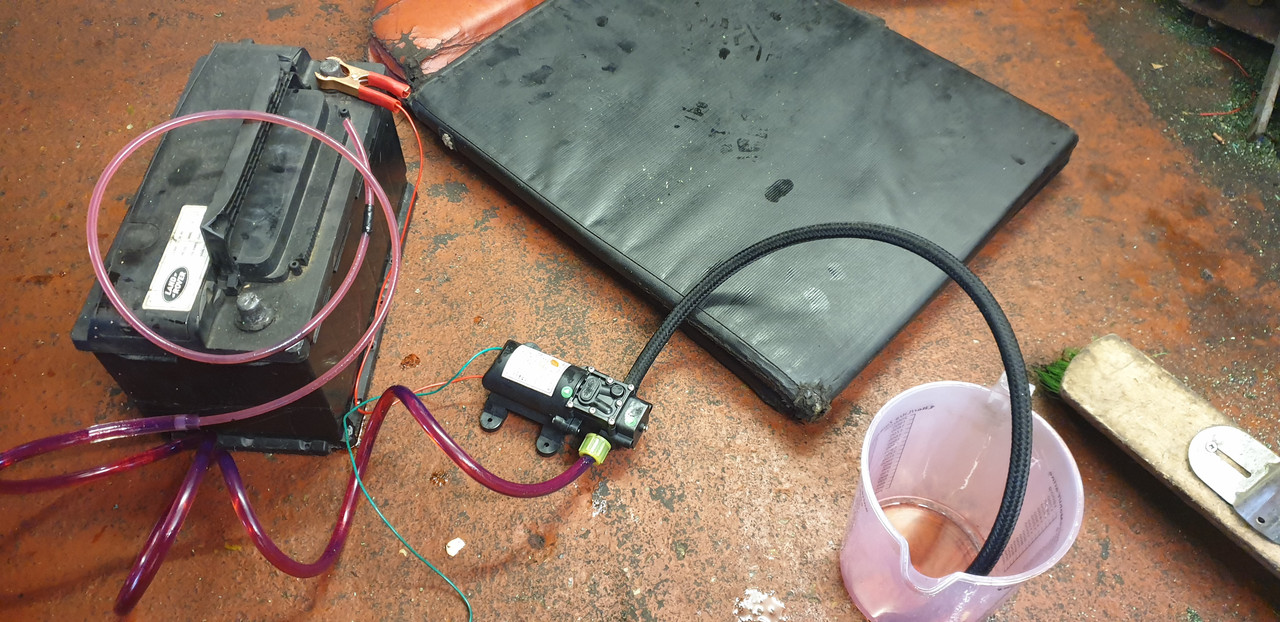
Anyway, my method was devised to avoid touching the gearchange unit. I achieved this simply by buying a cheap 12v oil transfer pump from eBay for around £12. One of these:
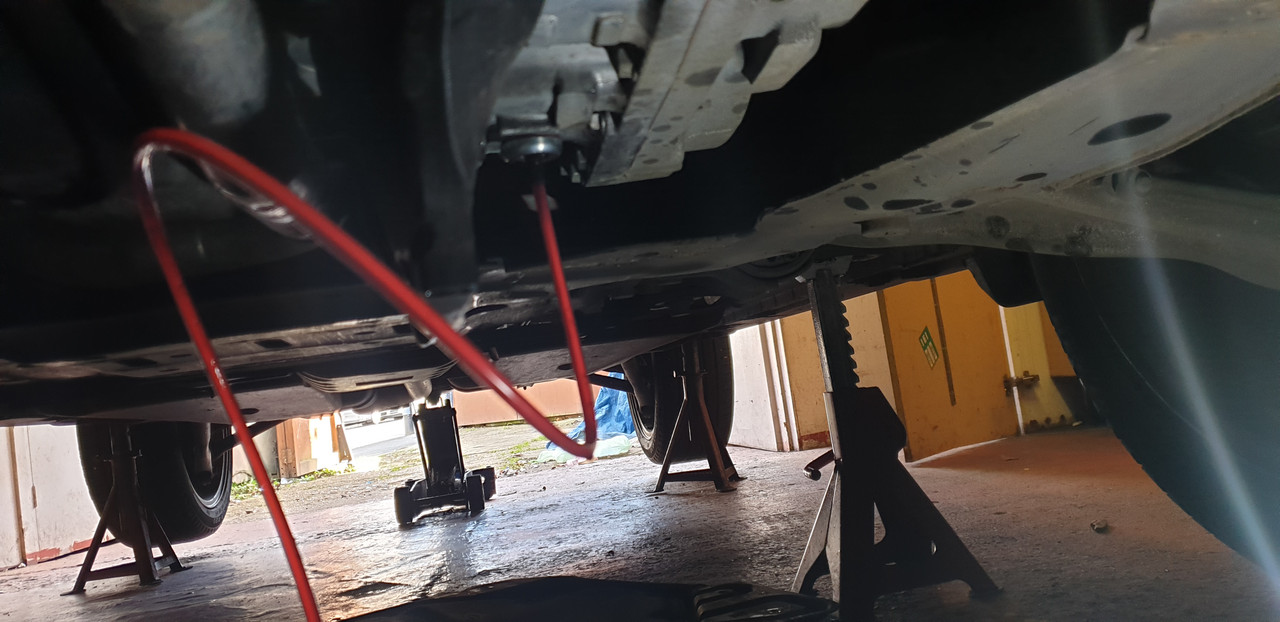
I started by raising the vehicle slightly, removing the bottom cover and after removing the oil level checking screw, removed the 17mm combined drain/level plug. I had a 17 mm Allen bit but you could get by with using a 17mm nut with half in the plug and half in a socket.
The oil auto transmission level on the Evoque is checked by removing the T40 drain screw with the engine running and at a temperature of 50°-60° C. A drive round the block should get it near to this temperature range. The drain plug incorporates a tube that is used to set the level - remove screw with engine running and allow any excess oil to drain. If no oil comes out, oil should be added through the filler plug. This is the combined plug.

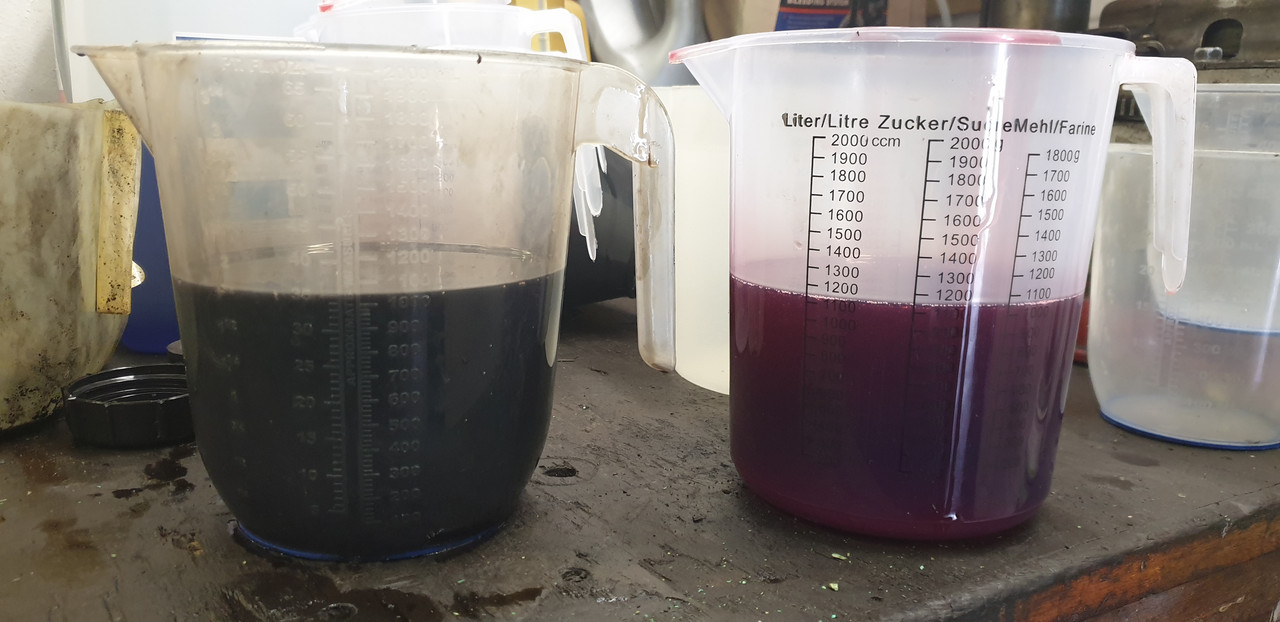
This is a picture of the old oil, next to a jug of the fresh oil:
After removing the plug, I drained approximately 3.7 litres out. I then refitted the plug. I replaced this fluid with fresh oil using a fluid transfer pump, pumping the fluid back up the level pipe. Like this:
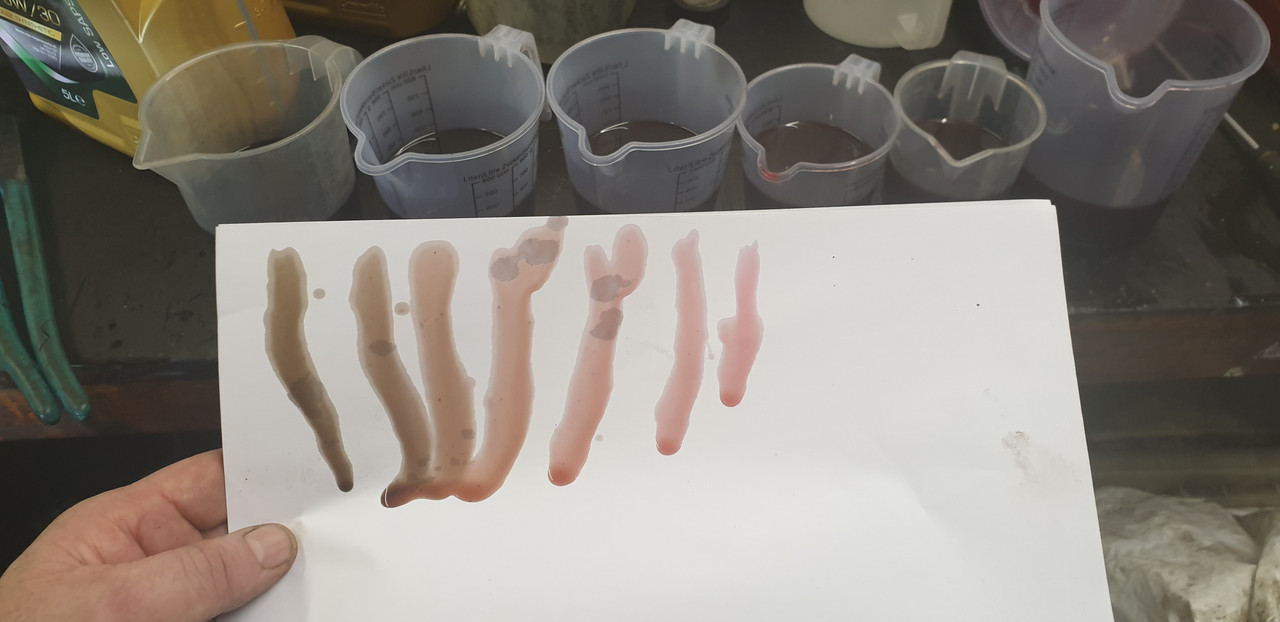
When filling, I filled in two stages. 2 litres in first, then approx another 1.7 litres with the engine running. I repeated this 6 times as I had 20 litres of JWS 3324 fluid (£85 from Smith and Allan on eBay). Here’s a shot of each batch of oil removed and you can see the change in colour:
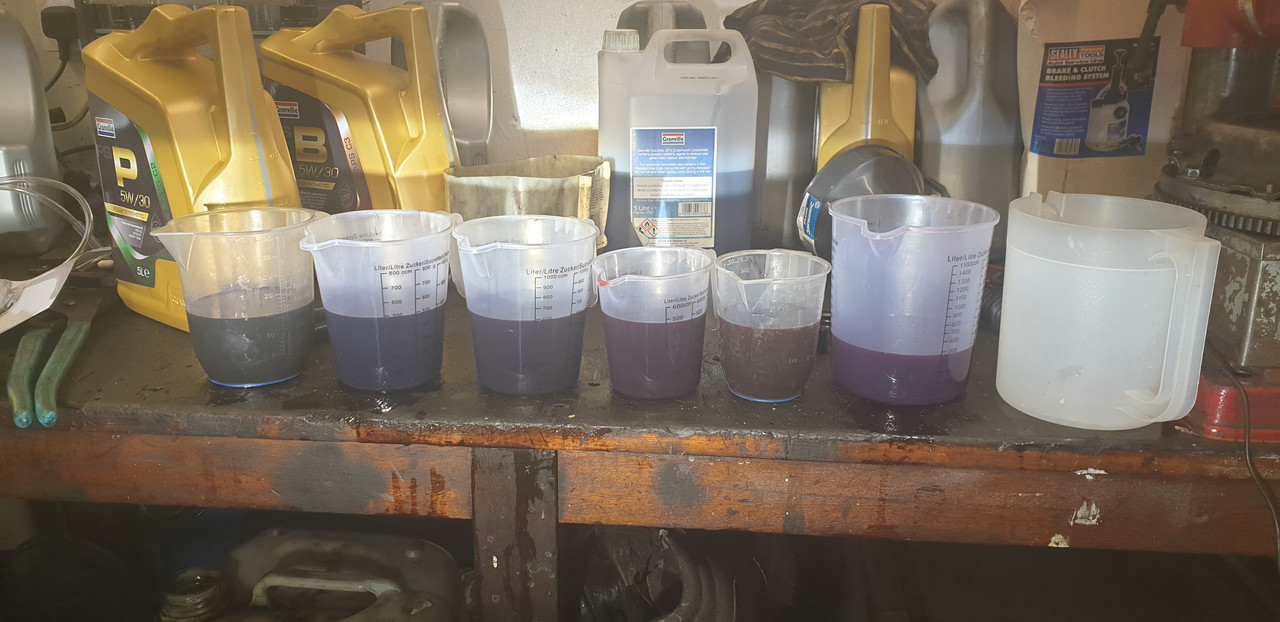
It’s even more noticeable on a sheet of white paper. Left to right with the last sample being fresh oil:
I didn't bother refitting the checking screw between dumps and I just selected gears P-R-N-D-S and back a few times after each fill. Finally I added approx 4 litres on the final fill and left the engine running for 15 mins to allow the oil to reach temperature and settle to the correct level before refitting the checking screw. I didn’t use a new washer or 'O' ring as they were fine. It was a slightly messy task, made worse by me dislodging the fill pipe once when filling which resulted in a nice oil puddle on my floor!
On the final fill, don’t switch the engine off with the filler screw removed as the fluid level rises when the engine is not running and it will auto drain through the fill level tube.
And that’s it. I’d like to say it drove a lot quieter and smoother but, just like when I serviced my Haldex, there was no difference afterwards as it was fine before I did this and hopefully, it will stay that way. That's the whole point of preventative maintenance!
Anyway, my method was devised to avoid touching the gearchange unit. I achieved this simply by buying a cheap 12v oil transfer pump from eBay for around £12. One of these:
I started by raising the vehicle slightly, removing the bottom cover and after removing the oil level checking screw, removed the 17mm combined drain/level plug. I had a 17 mm Allen bit but you could get by with using a 17mm nut with half in the plug and half in a socket.
The oil auto transmission level on the Evoque is checked by removing the T40 drain screw with the engine running and at a temperature of 50°-60° C. A drive round the block should get it near to this temperature range. The drain plug incorporates a tube that is used to set the level - remove screw with engine running and allow any excess oil to drain. If no oil comes out, oil should be added through the filler plug. This is the combined plug.
This is a picture of the old oil, next to a jug of the fresh oil:
After removing the plug, I drained approximately 3.7 litres out. I then refitted the plug. I replaced this fluid with fresh oil using a fluid transfer pump, pumping the fluid back up the level pipe. Like this:
When filling, I filled in two stages. 2 litres in first, then approx another 1.7 litres with the engine running. I repeated this 6 times as I had 20 litres of JWS 3324 fluid (£85 from Smith and Allan on eBay). Here’s a shot of each batch of oil removed and you can see the change in colour:
It’s even more noticeable on a sheet of white paper. Left to right with the last sample being fresh oil:
I didn't bother refitting the checking screw between dumps and I just selected gears P-R-N-D-S and back a few times after each fill. Finally I added approx 4 litres on the final fill and left the engine running for 15 mins to allow the oil to reach temperature and settle to the correct level before refitting the checking screw. I didn’t use a new washer or 'O' ring as they were fine. It was a slightly messy task, made worse by me dislodging the fill pipe once when filling which resulted in a nice oil puddle on my floor!
On the final fill, don’t switch the engine off with the filler screw removed as the fluid level rises when the engine is not running and it will auto drain through the fill level tube.
And that’s it. I’d like to say it drove a lot quieter and smoother but, just like when I serviced my Haldex, there was no difference afterwards as it was fine before I did this and hopefully, it will stay that way. That's the whole point of preventative maintenance!
")


